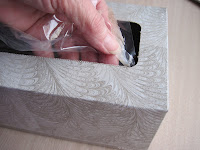
 This morning, I emptied a Kleenex box. I use these for storage in my craft room. While going through the process, I took photos so you could see how I did it.
I insert my thumb between the clear plastic around the opening and the cardboard, pulling the plastic membrane out of the box & discard it.
Next, I cut the top at the corners with a sturdy pair of scissor.
I apply a strong glue (I use Crafter's Pick Ultimate glue) under all the top flaps and push them to inside of box. Sometimes the sides of box separate, so put some glue under that flap also. Hold the glued flaps in place with clothes pins until the glue dries and cures.
I use these converted Kleenex boxes to store a lot of different supplies in my craft room. They are great for organizing bottles, rolls of tape or ribbon, scrap piece of cardstock, embellishments, etc. They also fit nicely on the shelves of a bookcase. You can label them, but I don't because I can see what's in them.


Absolutely BRILLIANT idea! Thank you for the step by step!
ReplyDeleteExcellent! Excellent! Excellent! I love seeing things re-purposed...
ReplyDelete