Tuesday, November 30, 2010

Embossed trees


These cards were made with Cuttlebug Embossing folders.  The card on the left is called Winter Trees and was embossed on light green cardstock, then highlighted with a Brilliance Gamma Green ink pad.  The circular image is  a Northwoods stamp.

The card on the right is from a Cuttlebug Lace Tree embossing folder, embossed on bright green cardstock.  I used a Brilliance Galaxy Gold ink pad to highlight the tree.  This card required a mask to keep the ink from the green background.  I embossed a piece of waxed paper, then cut out the tree portion and placed the rest of the waxed paper on the card before patting on the ink.  The Merry Christmas is a Class A'Peels sticker.

More Poinsettias


Here are 2 more styles that I made with the SU Petal-A-Plenty embossing folder.  The add-on poinsettia on the left was stamped on SU Shimmery White cardstock, watercolored and cut out.  The stamp is an older one that I've now misplaced.  I think it's made by DeNami.

On the card on the right, I added ink with a firm inkpad to the poinsettias, with dots of gold in the center.  It was cut in half diagonally to make 2 cards from it.  The red with white dots is by Die Cuts with a View Mat Stacks - brights.  The stamped circle poinsettia is by Northwoods and cut out with Nestibilities.  The ribbon was from Big Lots and used to cover the seam.

Monday, November 29, 2010

Poinsettia Christmas cards


I made several variations of this card.  The background is made with a Stampin' Up embossing folder called Petals-A-Plenty.  It just looks like a poinsettia to me.  The poinsettia is made with a die by BossKut.  It cuts serveral pieces, with a hole in the middle.  I just feed them onto a small brad, so that the petals remain adjustable.

Sunday, November 28, 2010

Another Christmas card


These cards were made with holly border punch.  If I cut all the way across the piece of cardstock, it leaves just a narrow strip with the holly punched out.  I decided to leave a space at both ends so that it would stay on the larger piece.  The Merry Christmas stamp is by Denami and embossed in gold.  The gold holly on the left is a metallic sticker.  The red and green holly is a two stamp set by Magenta.  The solid green and red are stamped first, then the outline of the leaves is stamped in black ink, using a Stamp-a-ma-jig.

Saturday, November 27, 2010

Snowflake cards

I managed to make most of my Christmas cards in the summer time.  When you live in the desert southwest, it's very hot during the summer months.  I find this a good time to stay in my air conditioned home and make Christmas cards.  I started off by teaching teaching a class at Senior Circle.
Playing with snowmen and snowflakes is a good way to take your mind off the heat outside.  Since this is a beginners class, I keep it simple by using stickers.  I did show them how to use the snowflake embossing folder to make the background and how to attach the ribbon to back of top layer.
This is another variation, using a border punch to create the paper ribbon.  The saying is a stamp by Hero Arts.

Friday, November 26, 2010

Black Friday

I'm not brave enough to go out and fight the crowds, so I've done my Black Friday shopping online.  Some of these sales were advertised a few days ago, so I could plan.  Today, I received a package that I ordered earlier in the week.  This is one of my purchases:


I already owned the red ATG 714 and love it, but I had to try the new pink one.  They appear to be the same, except for weight.  The red one is much heavier.  It was also much more expensive.  I think I paid over $50 for the red one a few months ago.  I just got the pink one for less than $19.  Since I use a lot of adhesive in card making, they will both get used a lot.  Time will tell which one I use the most.  The tape rolls look about the same, but I don't know if they are interchangeable.  I'll try that later.

I also placed an order to another company at 12:03 AM, because it was only a 9 hour sale that started at midnight.  That company had the rolls of tape for this gun at a lower price, so I ordered some more.  I also have some Spellbinders dies and a few other things on order.

This was a fun day, since we have lots of left-over turkey to eat.  I did all the cooking yesterday.  After this little break, I'm going to have to get back to making cards.  Lots of birthdays in December.  I also have Christmas cards to address and get mail.  I'll post some photos of the cards I've made in the next few days.

Wednesday, November 24, 2010

Time to be thankful

Thanksgiving is a time to think of all the things we are thankful for.  I have a lot to be thankful for and here are two of them:

This heron was posed on my neighbors roof today.
  
My Christmas cactus plants seem like Thanksgiving this year.
I'm very thankful that we don't have severe winter weather, as they do in some areas. I'm thankful for our blue sky and warm, comfortable home.
I'm thankful for my craft room with all it's piles of art supplies.
I'm thankful for my dog, Tex, who loves to play in the grass.  Actually, he just plain loves to play.


I'm thankful for the family and friends, who make my life fulfilled.
I'm thankful for our military men and women, who give so much of themselves to preserve our freedom.


Monday, November 22, 2010

With this final design, I'm calling it quits on the Archway Cookie Challenge.  I need to get those Valentines that I have finished in the mail to Operation Write Home. 

Don't forget to vote for Operation Write Home in the Joann's Craft for a Cause campaign.  This money will be put to good use for postage to mail the boxes of cards to our heroes.

Now, I think I need to get back to planning Thanksgiving dinner.  I need to look in my cupboards and check out the fridge to make sure everything is on hand before the cooking begins.  The turkey is thawing in the fridge and most of the shopping is done.  I just have to make the list and check it twice.  Then, the real fun begins!

Sunday, November 21, 2010

Still making Valentines

I'm going to have to quit making Valentines soon and get them in the mail.  For the Archway Special Mission, they need to get to the shipper by Dec. 1.  With a holiday weekend approaching, I need to get them mailed.
These are made with an older Cuttlebug Folder with hearts.  I've been trying to locate some ribbon that won't clash with the paper I've chosen.  The stickers are the metallic Peel-Off stickers.  The scanner doesn't do them just, but they are shiny gold.

Since yesterday was my birthday, I thought I'd show you the handmade cards I have received from my stamping friends at Gingerwood Bulletin Board.

Friday, November 19, 2010

More Valentines

I'm still making Valentines for Operation Write Home Archway Cookie Special Mission.  I've made 6 of these today.
This a a new Martha Stewart Punch Around the Page set.  It's called French Scroll.  Isn't it pretty?  The larger saying is an old Embossing Arts stamp.  The Happy Valentine's Day stamp is unmounted - source unknown.

Tuesday, November 16, 2010

Time for Valentines

Operation Write Home has a Special Mission from Archway Cookies.  The volunteers need to make and send in 4000 Valentines by December 1.  If we accomplish this, Archway Cookies will send cases of cookies to the deployed troops.  This is what I've accomplished since Saturday.  I'm still working, so we'll see how many I can complete.

Most of these were made with Heart shaped Spellbinders Nestibilities and a Cuttlebug set called Love Language.  It contains the embossing folder with the tiny hearts all over it and a die that cuts out all these words and shapes.  I've also used a few rubber stamps.

Back to work!  Will you join me in the effort?

Saturday, November 13, 2010

OWH Veteran's Day Bloghop

Welcome to the Valentine Blog Hop
If you arrived here from another source, you can start at the beginning by going to the

My earliest memories from childhood are seeing those 'funny looking letters' arrive from my brother who was in the Navy.  I didn't really know him then because I was too young when he left.  I know the letters made my mother cry and she saved them all.  All I understood then was that I had an older brother who was in the war.  As I became more aware, I learned that he was in the South Pacific.  I have later learned that he was on Guadalcanal.  When I did see him after the war, his skin was still yellow from Malaria and he was quite thin.  It's hard to believe that this happened nearly 70 years ago.


I learned to love my brother and became close as he was married and raised a family.  He's still very important to me, but has never talked a lot about those experiences.  Thank you for your service, Loyd.

I have also known many other friends and family members who are veterans.  My husband spent 20 years in the Air Force, as a fighter pilot, and we currently have several grandsons on active duty.  I honor and respect them all.

My support for OPERATION WRITE HOME began after the Memorial Day Bloghop in 2009.  We make cards for our heroes to send home to family in friends.  There are rules and deadlines for the type of cards we make.  You can learn more about this HERE.

We must make cards for special holidays well in advance to allow time for shipping both ways.  The deadlines for Thanksgiving and Christmas cards are past.  The deadline for Valentines is January 7, 2011.


Background is made with a Cuttlebug embossing folder - those are raised hearts all over it.  The cut-out letters and hearts are also from the same Cuttlebug set - Love Language.
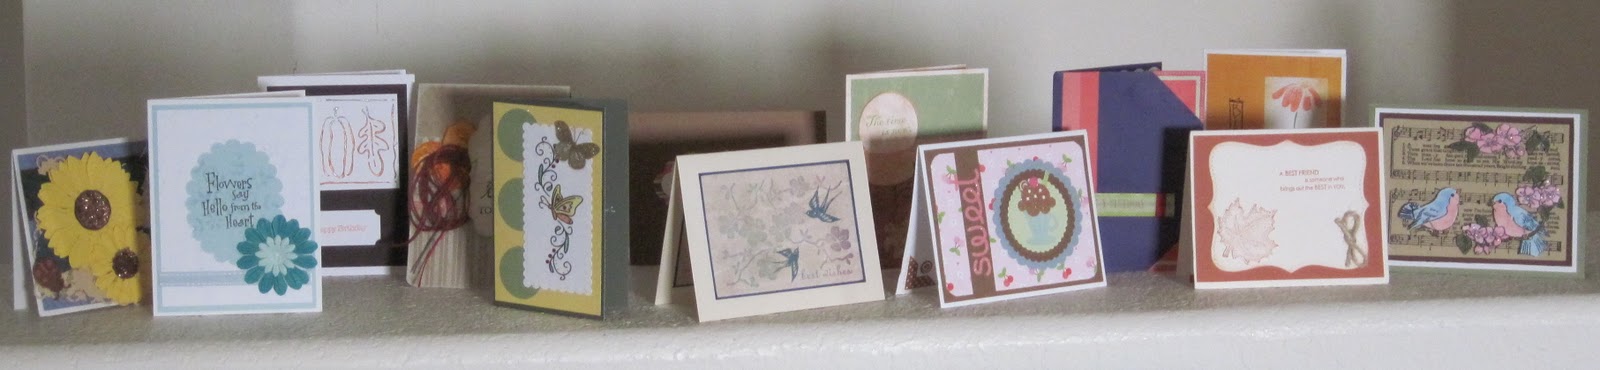
Instead of just saying Happy Valentines Day, I like to make more generic Love cards.  These are more versatile for our heroes to send home when they have time.

Besides holidays, there is always a need for Birthday, Thinking of You, Missing You and just plain Hello cards. They don't even have to have a specific message.  This gives our heroes the option to use them as needed.  Don't forget, we have women serving also and they may wish to send masculine cards.  Many of our heroes also have children at home, so cards for children are needed.  Lots of options here.  We also try to include Any Hero cards in each package.  These cards are for the troops to show our support.

If you wish to help out the troops with Archway Cookies for the holidays, participate in this SPECIAL MISSION.  Start making Valentines that can be sent in before December 1.

Now, hop on over to Brittany at Levels of Light:  http://levelsoflight.blogspot.com/2010/11/owh-valentines-day-blog-hop.html

Thursday, November 11, 2010

Veteran's Day

Veteran's Day is a day set aside for honoring our military veterans.  We have our veterans to thank for all the freedoms we enjoy.  I honor them every day, but today we celebrate their sacrifices.  This display of One Thousand Flags over Mesquite is on display in our little town in southern Nevada.

One way that I honor our military troops is by making cards for Operation Write Home
This is a card I made, in multiples, to send to our troops for Christmas.


The embossed gold stars is made with a Cuttlebug folder called Winter Stars.  The poinsettia is made with a die from Boss Kut and held together with a flower brad.  Both stamps we purchased from DRS Designs.


Before mailing, a personal message will be
written inside these cards to let them know
that we honor them.


Wednesday, November 10, 2010

Please vote for OWH

Vote daily for Operation Write Home at
These funds will help us keep the cards flowing for our heroes.

More Thanksgiving cards


I've learned that it is easier for me to make multiples of card designs.  This works well for the troops, since they are mailed to different units.


These are real pressed leaves from my back yard.  Each leaf is different, so there's plenty of variety.


These cards were made with die cut leaves that have been colored with chalk.  Some of these cards were mailed to Operation Write Home and others will be for personal use, mailed for Thanksgiving.

Tuesday, November 9, 2010

Thanksgiving time

As age creeps up on me, I'm learning a few things.  It takes me longer to design a card and even longer to get the cards made.  For this reason, I must start well ahead of the time I need to mail my cards.  This works out well for Operation Write Home because their card deadlines are far ahead of most card makings.  The cards have to be boxed up and mailed to the shippers, who have to repackage them and send them to the troops.  This makes it possible for our heroes to write a personal message and send the cards to their loved ones back home.

I spent our hot summer months here in the desert making Thanksgiving and Christmas cards.   Since many of you are just beginning to think of the holiday season, I plan to post some of the cards that were made months ago.

This stamp is from Paper Inspirations.  They make a series of these stamps for many occasions.  The punched frame is made with a punch set by Martha Stewart.  The patterned paper is from my stash, so I don't know who made it.

Monday, November 8, 2010

More info on voting

Now that voting's underway, here is more about how it seems to be working.
It's effectively one vote per household; they're blocking IP addresses from voting more than once to prevent fraud. That means all your home computers count for ONE vote, since they all log onto the internet through the same IP address. Send your hubby to work with the url, and your cardmaking child can use their phone if it's not using the home's internet connection. Just make sure everyone's voting just once.
Wait a full 24 hours before voting again. Even if trying from your work computer, you'll be blocked from voting if it hasn't been a full 24 hours. That means vote at the same time each day to maximize the number of votes you can cast all month long!

Sunday, November 7, 2010

Please vote for OWH

Operation Write Home is in a contest to win funds from JoAnn's Craft For a Cause.  The funds are needed to help pay postage to mail the boxes of cards to our troops.  Please click on the this link: http://www.joann.com/joann/common/content_noleftnav.jsp?catName=craftForaCause

Help us out by voting for Operation Write Home.  You can vote once daily until December 4, 2010.

Happy Fall Y'All

A nice thing about making your own cards is that you can make them any size you want.  Recently, I had something to mail that required a large business envelope (#10). 
I wanted to include a card, so I made one to fit.  The card is 4" X 9".
The top and bottom embossed panels are made from a piece of cardstock that had been embossed with a Cuttlebug embossing folder (3 1/2" X 5 1/4"), which I cut in half diagonally.  The center panel was cut from another piece at the same angle.  The stamp is an old unmounted one so I don't know who made it.  This was cut out with a Nestie.  The pressed leaves are from my neighbor's tree that fall in my back yard.  I collect and press them every year.  It's a crabapple tree.

Saturday, November 6, 2010

Veteran's Day Parade

We live in a small town in southern Nevada.  We love our parades, but they aren't fancy like the big cities.  Our parades are all held on Saturday so more people can participate.  I attended the parade this morning.
We are very proud of this young lady, who won the
VFW Patriot's Pen essay contest, titled: 
"When is the Right Time to Honor Our Military Heroes?"
 
My husband had the honor of driving the car for her in the parade.  Yes, that's his car.

If you would like to read her essay, it is at this link:
http://www.vfw.org/resources/pdf/2010EssayBarnard1stPL.pdf

Friday, November 5, 2010

Swing card

Even old dogs can learn new tricks.  I enjoy trying new styles of cards.  This one may not be new to you, but I've just learned how to make it.
The trick on this card is cutting and folding it so that the middle panel swings when you open it.  The Happy Birthday panel is actually on the back of the card, but shows on the front when folded.

When opened fully, you can read the sentiment that would normally be on the inside of the card.
The flouishes are made with Spellbinders dies from the same cardstock as punched frame.  The leaves are from the punched frame.  Paper pieces are just cut from scraps because they don't use much paper.  Each piece is only 1" wide and length cut to fit space.

This is the back of the card.  The center panel is attached at center top and bottom, but cut out around both ends.  The green frame is cut 3" X 4" and punched with a Fiskars corner and border punch.  One thing I like about these punches is that they leave slots for inserting the message panel.  These panels can be easily removed and replaced without damaging the card.  I make the message panels from the same cardstock as base card so they don't show much.
One disadvantage to this style of card is lack of space for adding a personal message.  I try to use fairly plain paper on the back to accomodate a small message and signature.

This card is cut 5 1/2" X 6 3/4".  The score lines are 2 3/4" from each end.  When scored and folded, it fits nicely in an A2 envelope.

Thursday, November 4, 2010

Autumn leaves

When the leaves are turning, I begin collecting the leaves for pressing.
My husband kindly built me a flower press.  Two squares were cut from plywood.  (Tip:  Keep the two pieces together while drilling holes, so they line up.)  Holes were drilled in the corners and long bolts were threaded through the holes, with washers added.  Wing nuts hold it closed.  I bought a large sheet of blotter paper and cut it to fit, then cut up a large cardboard box the same size. 

Leaves are placed between 2 pieces of blotter paper, then covered with the cardboard square.  I cut off the corners of the squares to make room for the corner bolts.

After several weeks or months, remove the pressed leaves and glue them to greeting cards with Crafter's Pick  Ultimate liquid glue.  I coat the back of dry leaves with the glue, using a toothpick.  Handle carefully or the leaves will break.  Place them on your card and press firmly and allow to dry thoroughly.

Operation Write Home

I try to make a lot of cards for Operation Write Home.  This group sends handmade cards to our deployed heroes for them to send to family and friends.  We also include Any Hero cards to support our heroes in all they do for us. 

This is an example of a recent card I made for them.  On the inside of card, I write a personal message of encouragement for one of our many heroes.

Wednesday, November 3, 2010

My first post

I've always heard that you can't teach an old dog new tricks, but cardmakers are always learning new things.  My plan for this blog is share some of things I've learned and am still learning.