Friday, February 28, 2014

Scrap problems

I've been stuck in a rut and took some time away from my craft room to do some yard work.  I'm tired, but hope the plants do better when the new growth begins.  Suddenly, I realized that March is quickly approaching and I have a lot of family birthdays in March.  I quickly made and mailed one that was imminent.
Now, before I begin the rest of the cards, I think I need to clean up some of this mess.
The problem is that I'm overwhelmed and don't know where to begin.  I may have to go watch the video from the Scrap Wrangler.

Wednesday, February 19, 2014

Choosing colors

After tucking and sorting my cards for the next box for Operation Write Home, I discovered that I needed more 'love' cards.  I picked out some sentiments and proceeded to make some cards.  My first group just didn't please me.
 
After staring at these cards to see why I didn't like them, I slept on it.  The next morning, I looked at them again in daylight.  Surprise!  Those flower centers were brown, not black.  I had more of that paper, so decided to pair it with brown and this is the result.
I liked this card, so made 3 of them.  The lesson here is to look at colors in good light and try to use colors that look good together.  A color wheel can be very helpful, but I admit that I mostly just choose what I think looks good together in daylight.


Friday, February 14, 2014

Fisherboy card

Recently, I was looking at a group of my old rubber stamps that don't get used often because they look better when colored and I don't enjoy coloring.  I stamped them and gave them to a couple of friends who do enjoy coloring.  Susan returned this little fisherboy all colored and fussy cut and challenged me to make a card with it.  Here's my resulting card.
The stamp is unmounted and I have no idea who made it.  The background stamp is from Posh Impressions.  Sentiment is a Cuttlebug die.

Wednesday, February 12, 2014

Playing with old tools

Can you take one more post about the brayered background and white embossing?  These images were stamped with Versamark ink and embossed with white embossing powder.  I then, brayered ink from Kaleidacolor ink pads over the image with a foam brayer.  These backgrounds are not as intense as the previous ones because of less passes with the brayer. 


Once again, I didn't have dies the right size to cut out these images.  I pulled out some of my old unused supplies to create these.  The white scalloped oval frame was cut with a Sizzix original die.  The inner oval was cut with a Coluzzle.  Do any of you still have these old nesting templates.  They work with a strange looking swivel craft knife and some special foam for a cutting mat.  They still work and love being used once again.  Show some love to your old tools.

The rectangle card could have been cut with a trimmer, but I used my old Evo Templates and a craft knife.  Instead of just storing your old supplies, give them some love.  They work as well as they did when we first bought them.
The B on some of the templates is a second set called In Betweens.  These fit between the sizes of the other set.  The round dots are finger dots added to help them stick to the image you're cutting.  I have other sizes and shapes also.  Before you look for these, they are out of business and you can only get them from people like me who kept the old tools.

Monday, February 10, 2014

Brayer comparison

I'm still working on my white embossing.  When I used the hard rubber brayer (red one), I got a halo around my image.  When I used the soft foam brayer (black one), the ink transferred right up to the image.
 
It took repeated brayering to get a nice image.  When I was satisfied with the results, I wiped the excess ink from the white embossed image with a tissue.
 
 
When the ink had dried completely, I used an acrylic template and craft knife to cut a circle of the finished product.  I didn't have a die that was large enough for this image.
 
These circles were quite large, so I chose to just adhere them to a white card base, with a simple sentiment.  The top 2 are on glossy paper and the lower 2 are on matte paper.  You can control the intensity of the color by the number of times you brayer on the ink.


Wednesday, February 5, 2014

Correcting problems

When I am not satisfied with my efforts to use a technique in making cards, I try to learn from my mistakes.  I used to just give up, but now I try to fix the problem.  I was stamping images with Versamark ink onto white cardstock, embossing with white embossing powder, then brayering on ink to create a background.  Some of my images turned out sharp and others looked blurred.  You can check my previous cards to see what I mean.  Here's a sample with 2 images with the same stamp.
The image on the left was stamped in my previous method.  When I look closely, there is a halo around my image. 

Perhaps I'm heating the embossing powder too long, but I found another solution.  I brayered on the ink first, then stamped and embossed the image.  I like this method better.  The image on the right was done with the 2nd method.  Here's some cards I made using this method.


Sunday, February 2, 2014

White embossing

I spent some time playing with the technique of stamping with Versamark ink onto white cardstock, then embossing with white embossing powder.  The next step is brayering ink from a multicolor ink pad over the white embossing to create a background.  I made several of these with several stamps.  The next step was turning these images into cards.  Here's some of my results.


This was a fun experience and I learned a few things during the process.

Saturday, February 1, 2014

OWH Card Bowl 2014 - ODBD Challenge

Since this is Superbowl weekend, Operation Write Home is having a Card Bowl.  I haven't tried yesterday's challenge yet, but I made one for today's Our Daily Bread Designs challenge.  This challenge is to make a masculine card using brown in the design.

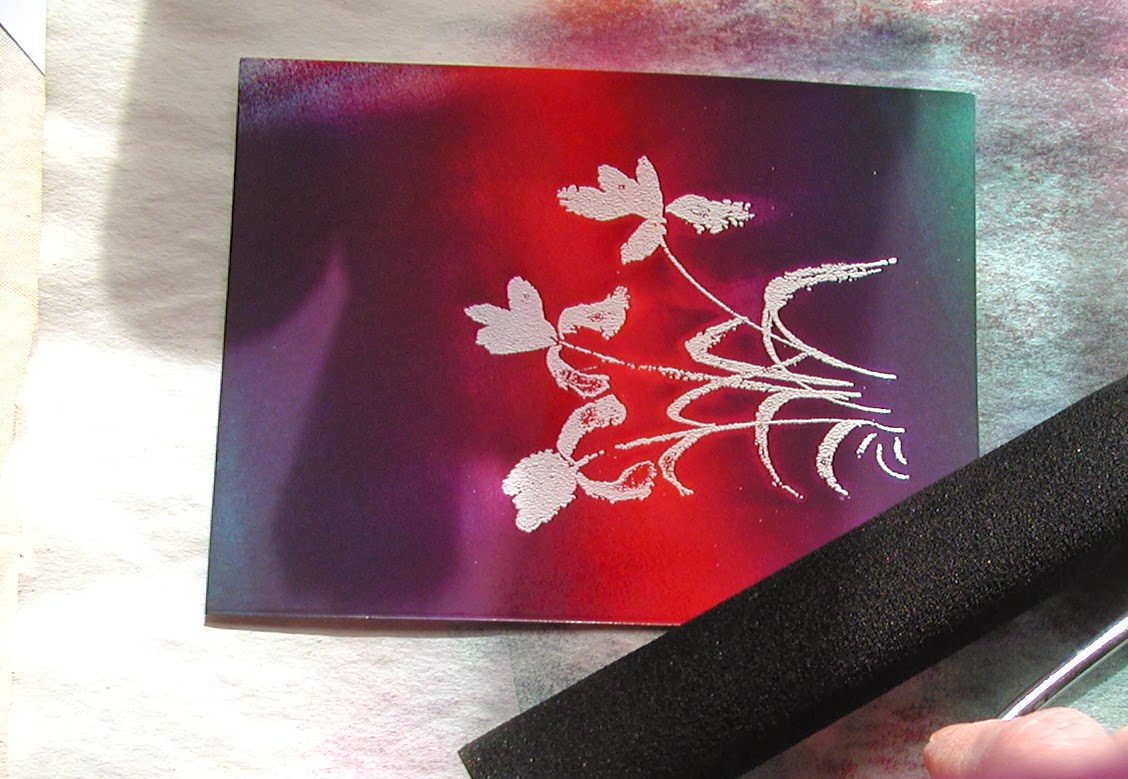
I started working on a technique that I saw in a magazine, using embossing resist.  This is the card I made first, using white embossing powder.
I stamped the Penny Black image with Versamark ink and embossed with white embossing powder.  Then I used sponge dauber to added the background of colored inks.  I then wiped the white embossing with a tissue to clean off all ink.  I cut this out with a Spellbinders die and adhered it to white cardstock.  The black border is just computer generated to show the card edges.
This card was made with a clear stamp of wheat.  I stamped it with Versamark ink and embossed it with a tan colored embossing powder.  The background ink is brayered on using a Kaleidacolor ink pad, called Autumn Leaves.  I cut out the image with a Spellbinders die, then used the same die to cut a scrap piece of cream colored cardstock to stamp the image.  Background was embossed with a Cuttlebug embossing folder.