Tuesday, December 26, 2017

Belated Merry Christmas

Christmas found me setting up my second new computer in a month.  The first one wouldn't let me add my photos or do most of what I'm used to doing.  This oldstamper had to return to a new model of a computer that I know how to use.  Here is my Christmas tree this year:
I also made one more card for Christmas:
Now that the Christmas preparation has ended and past, I need to begin to prepare for the new year.  I'm hoping things will go smoother for a while.


Tuesday, December 5, 2017

Adustments to cards

I was concerned that my cards were a little too simple in this post, so I used a die to create a star and added it to cards.  I'll only show a few, but I added the star to all of these cards.


Sunday, December 3, 2017

More quick Christmas cards

Following the same technique as previous post, I created another full sheet of watercolor background.  I also spritzed some gold Perfect Pearls mixed with water onto the background in both posts.
I cut this down into 2 pieces that would fit my dies and my die cutting machine (Big Shot).  I used a Simon Says Stamp stitched rectangle die to cut out 5 card front backgrounds.
I stamped the sentiment with an Art Impressions stamp in Versafine onyx black ink and clear embossing powder.  Next, I cut a slightly larger rectangle from black cardstock, using a Hero Arts infinity rectangle die.  I adhered all layers to a white card base.  Tip:  Use a strong adhesive to adhere the watercolor paper to others.  I used Tombow Xtreme tape.
I could continue to make more cards with this technique, but I think this will be enough for me,  Now to get them addressed and in the mail.

Saturday, December 2, 2017

Christmas cards

Since I'm now way behind schedule for making Christmas cards, I tried one using a watercolor background I had made earlier.

I was saved by a video by Sandy Allnock.  She showed how to make multiples of Christmas cards.  Boy, did I need this.  First I made a couple sheets of watercolor backgrounds.  Since I didn't have the same supplies, I used what I had available.  I used Arches watercolor paper and Peerless watercolor papers.

After allowing these to dry overnight, I cut out 5 card size pieces from each large sheet with a Sizzix die.
The next step was to turn these into cards by stamping a sentiment and then layering the cards onto gold paper and a white card base.

Only one is these has the sentiment embossed in white, the others are in gold embossing powder.  I'll show the one with white below:
Here is one of the gold ones below:
I had 2 pieces that weren't working with the previous treatment, so I stamped a different sentiment in black and added a black layer.

I have a start, but will need to make more.  I hope I can get them mailed soon.


Friday, November 24, 2017

Holy Cow!

A lot has happened since my last post.  My computer developed problems and I bought a new one.  I had problems getting it set up.  Then, my grandson arrived and helped me out.  His wife and brother have also been here, so I haven't spent much time on computer.  I did manage to create a birthday card for my brother who will turn 96 in December.

This is an old stamp from Embossing Arts.  I stamped it on white cardstock and fussy cut the cow and mounted it on foam tape on a pearlescent paper.  There is Wink of Stella on the wings and gold embossing powder on the halo and sentiment.  Inside the card it says "You're how old".  After the grandsons go back home, I'll try to make some Christmas cards.

Monday, November 13, 2017

More Thanksgiving cards

Since I'm running out of time, I quickly finished assembling my Thanksgiving cards so I can get them in the mail.


Thursday, November 9, 2017

Thanksgiving Watercolor

It's been over a month since I made cards.  I finally decided that if I was going to use the autumn cards I had started, I must finish them now.  I located the pieces I had started and assembled some.  Here's the result:
I have some others partly made, but not assembled as yet.  Hopefully, life calms a bit and I can finish them and get them in the mail.

Thursday, October 5, 2017

Respect for life


Life is precious.  It is a gift from our creator and should be preserved.  I cannot understand why so many people are willing to destroy the life of others.  This thought was recently revived by the way a mass murderer can take the life of people he didn’t even know. 

This disrespect for life has been growing over the years.  I first became aware of this when I saw how easily people destroy the life of a tiny life before the baby has enough awareness to protect itself.  The sheer number of abortions is overwhelming.  How can anyone just callously murder these tiny beings?  I just can’t understand.

I hear so much hate language and total disrespect for others that makes it possible to destroy the precious life of another human being.  There seems to be no tolerance for the beliefs of those who do not agree with us.   Humans have a great brain to form their own opinions and the more we learn to listen to the thoughts of others, the better we will understand our differences.
Over the years, I’ve noticed great divisions in groups of people.  I have always believed that we are all created equal and should be able to coexist on the earth.  Why all the division.   For some reason, groups are influenced to disrespect and even hate those who disagree with them.  What or who is making this hate and disrespect grow so intently?

Sunday, October 1, 2017

Watercolor Thanksgiving

I've made a few more watercolor backgrounds to make Thanksgiving cards.  This is the first one I've assembled.


I also made a birthday card for a good friend with the Hero Arts layered pumpkins.  I did a lot of masking to get the two pumpkins and stems lined up.  The ovals are popped with some foam tape, but that doesn't show in the photo.


Wednesday, September 20, 2017

More autumn cards

I had one piece of the Color Burst watercolor backgrounds left, so I cut it into strips for these three cards.  The sunflower and pumpkins are from the Hero Arts stamp set.


Tuesday, September 19, 2017

More autumn cards

I managed to assemble 2 more autumn cards on watercolor backgrounds.  These use an oak leaf and acorn.  The first card has die cuts flat on paper and the second card has them popped on foam tape.


Monday, September 18, 2017

Autumn cards

Sorry, I took a break from making cards, but I managed to create cards with a couple of the Color Burst backgrounds I made earlier.
 

The leaf was cut with an old Spellbinders die from Core-dinations cardstock, then sanded to reveal the core.  I wasn't pleased with the color that showed with the sanding, so I dabbed some orange ink over the scored veins.  The Sunflower is from a new Hero Arts set.  I have more cards started and will show them soon.


Saturday, September 2, 2017

More Color Burst trials

Yesterday, a friend came to visit and wanted to see how I used Color Burst.  I tried to brush on the water, then lightly dust with the Burnt Orange Color Burst.  It wasn't showing well, so I sprayed it lightly with water.  The paper got a little too wet, so I tipped it to allow the water to run.  This created the muted lower left side.

I tried once more on a fresh piece of watercolor paper.  This time, I ended up with a big blob of the powder, so I used the brush to spread it out a bit.  This totally changed the look to a flat solid brown, so I added some coarse salt and covered it with wrinkled plastic wrap.


The final image is with the paper dried and salt removed.  In the previous image, the salt is still on the paper.

Friday, September 1, 2017

Playing with Color Burst powder

Yesterday, I spent the day testing the Color Burst powders to make backgrounds for cards.  I only bought 2 colors at a rare visit to a craft store.  After the tests in the previous post,  I decided that I needed to clean up the desk and my hardboard because that powder spreads everywhere.  It's a very fine dust and very concentrated color.  If touched by water, it really shows it's presence.  I thought perhaps the left over dust from first test contaminated the second sample.  However, I learned that the bottle contains many colors.
 
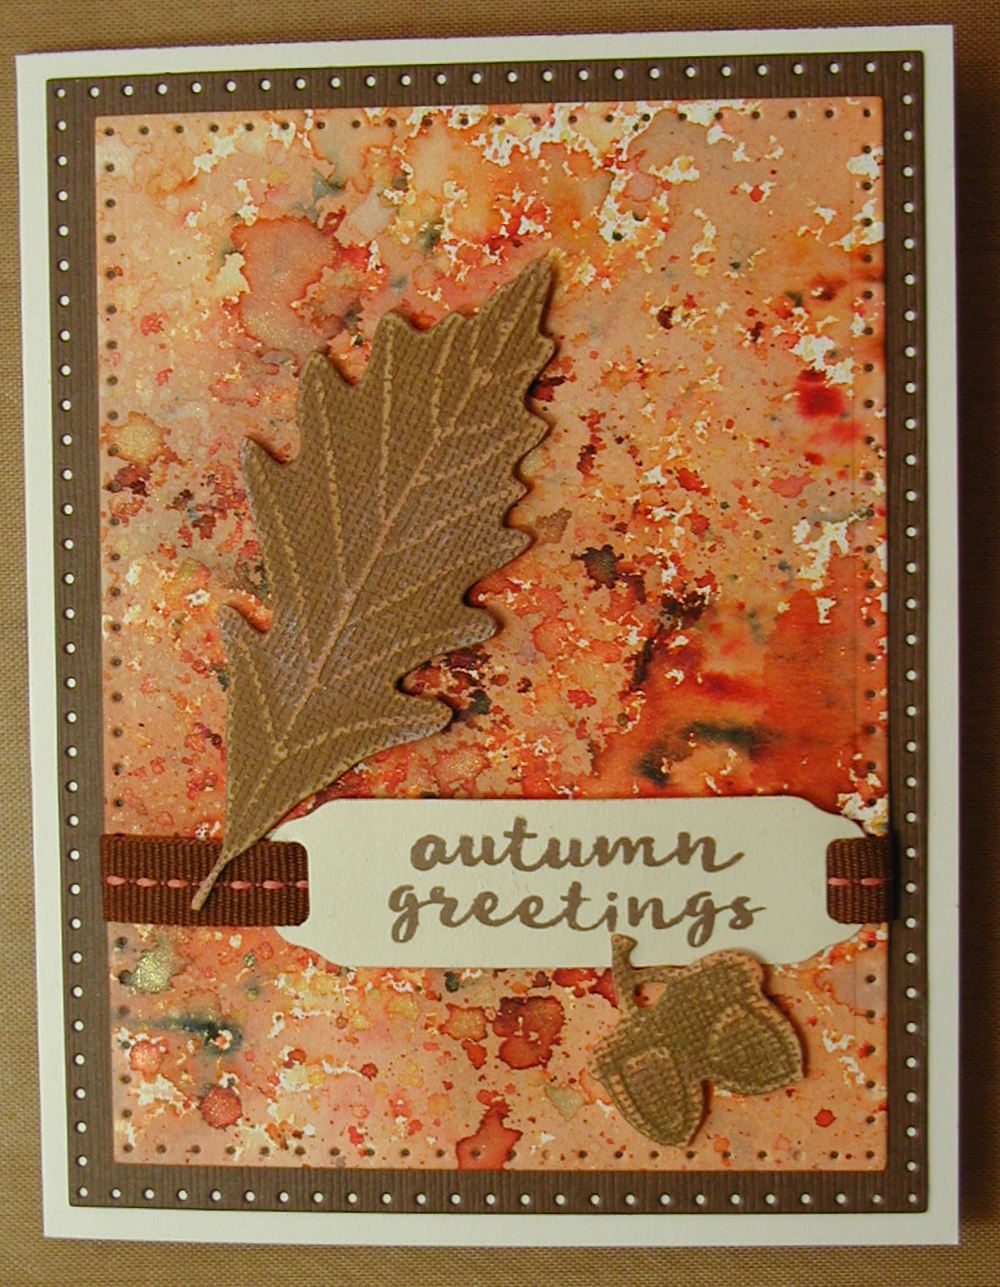
 I wet the paper with a brush instead of the spray bottle.  I then added a smaller amount of the dust.  This allowed the individual colors to show.

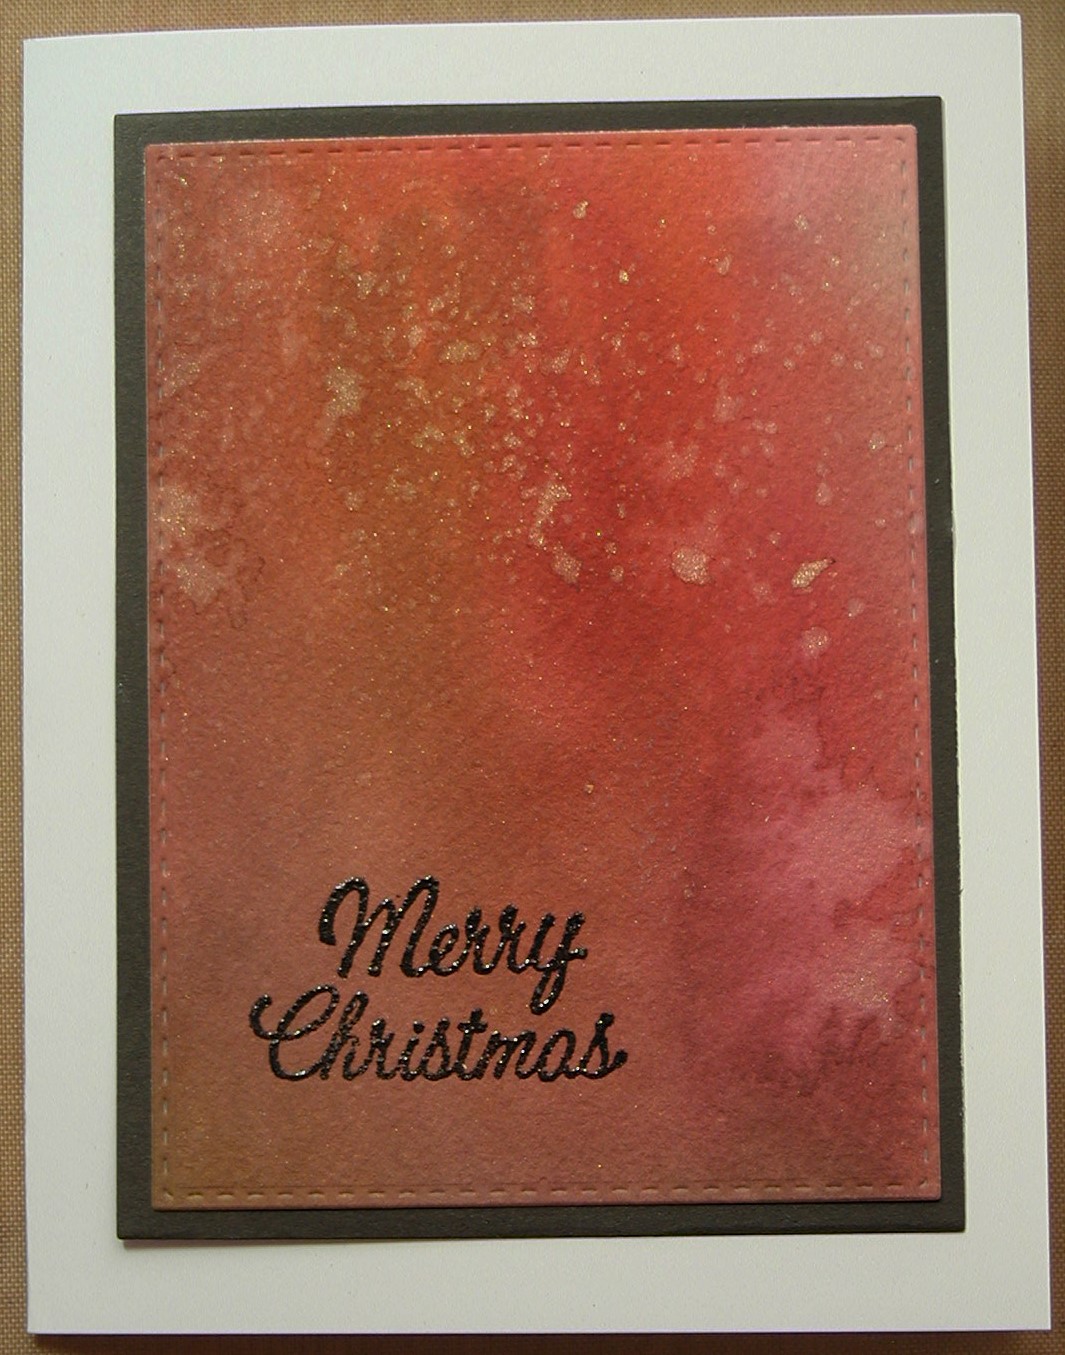
In this sample, I used the same technique as the other one, but got a large puff of the powder in one area.  I attempted to remove some, but it was already wet.  I sprayed on more water and used a paper towel to absorb as much as I could, but it left a dark mess is center of paper.  I may have to cover it with a large die cut.

In this sample, I used only the brush to add water to paper, then spritzed a small amount of the dust onto the wet paper.  Again, you can see all the colors in that one bottle.

Lessons learned:
1.  Clean off your desk first, so surface is easy to clean up after each test.
2.  Use water and powder sparingly to avoid a big mess.
3.  Clean everything thoroughly after creating such a mess.


Thursday, August 31, 2017

Color Burst trials

Today, I'm playing with making backgrounds for cards with Color Burst powder.  In this first one, I used 2 colors of the powder onto wet watercolor paper.  I allowed this to air dry overnight.  I think too much water muted the colors and they blended more than I desired.

In the second sample, I added only one color of the powder to dry watercolor paper, then lightly sprayed it with water.  There were some bare spots, so I added more powder and sprayed it again.  After this, I partially dried it with my heat tool.
It looks a bit like there's some blue in the finished background, but I only added the Burnt Orange powder.  Now, to try to make some fall cards from these backgrounds.  Stay tuned for results.


Watercolor rose

I'm still playing with the watercolor backgrounds that I made earlier.  This card also uses some new dies to cut out layers.
The rose and leaves were made with a set of layered flowers by Papertrey Ink.  I placed the rose on oval dies by Die-namics from My Favorite Things.  The outer rectangles are cut with Sizzix dies.  I tried really hard to get all the little dots punched out around the edges.  The Hello is a die from a set by Impression Obsessions.  I finished off the rose with some clear Wink of Stella pen for some sparkle.

Friday, August 25, 2017

Watercolor anniversary card

I've been working on creating cards with the watercolor backgrounds that I created earlier.  This background was a little dark and busy and many designs didn't work well with it.  I thought that gold embossing would show up, but didn't.  I filled in the heart, flowers and leaves with pearlescent watercolors.  It took several layers to make them show.  I even added some clear Wink of Stella pen to the heart for some sparkle.  The sentiment was completely lost in the background, so I stamped it on white cardstock and added a red frame to cover the stamped sentiment.  I also added a gold ribbon to anchor the sentiment.

I used Sizzix rectangle dies to cut out the layers.  I didn't notice until card was assembled that the pierced holes didn't punch all the way through.  I'll have to pay more attention the next time I use these dies.

Wednesday, August 23, 2017

Warm wishes

I'm continuing to make cards with the watercolor backgrounds that I created earlier.  This card is for a male relative who has a birthday soon.

Friday, August 11, 2017

Dragonfly watercolor

We've been in monsoon season here in the desert, with wind, thunder, lightning and rain.  This has interfered with my card making.  I have managed to create a new card with the background I made earlier with watercolor.
I managed to make a trip to a nearby city and went to a craft store.  I bought some new Memory Box dies to make this card.  The grass and 2 dragonflies are on one die and the 3 smaller dragonflies are in another set.  I already had ordered the sentiment dies that contain the Hello.  This card is completely flat, with looks like it may have some depth.  I have some other new toys that I'll try to use later.

Tuesday, August 1, 2017

Salted & wrapped watercolor

I decided to use some old, but never used stamps.  This set is by Papertrey and is called The Sweet Life.  It's made up of clear stamps and dies to make roses and leaves with 3 part stamps.  This has been a learning progress for me.  First, I made some backgrounds, using the salted & wrapped watercolors.  He's one in progress:

The top photo shows the wet watercolor with salt and plastic wrap added.  The lower photo shows the finished product.  I cut these backgrounds down to card size and looked for solid color cardstock to add a frame.  Then I started stamping and cutting out the roses and leaves in various colors.  Here's my results so far.

My next step will be to turn these into assembled cards.  I did complete one for a birthday card, but forget to take a photo before mailing it.

It's now afternoon and I managed to assemble one card to show you.